Monday, June 22, 2009

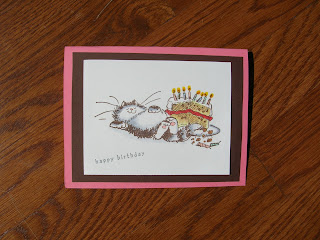
Content Cat


I borrowed a stamp from my friend and I cannot remember the name of the company. Colored it with Copic markers. Stamped 'happy birthday' in gray ink.

Sunday, June 21, 2009

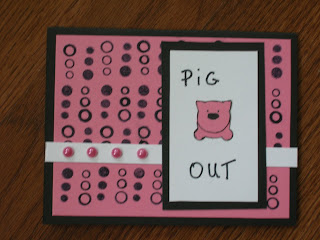
Pig Out


This is the one day of the year when you can pig out without feeling guilty!
Punched twice with Marvy 'Bear' punch on Stampin'Up Rose Romance cardstock. Cut the round ears into corner ears, cut the face like a circle and discarded the body. Second bear, cut the face and turn upside down like the front two hoofs. Used black marker and highlighted the edge of the face and hoofs. Two dots for the eyes and a small oval nose. Glued the pig. Layered on white cardstock on top of the black cardstock. Stamped two different circles 'Balloon' clear stamps (Dec. 2006) by www.kimemories.com in black ink on Rose Romance cardstock. Four self-adhesive pink pearls on white strip on the left side. Wrote 'PIG OUT'. Thank you for visiting my blog.

Tuesday, June 16, 2009

No Way


What do I know about bathing suits? Not a lot apparently! LOL! How times have changed! I don't want to be seen in my bathing suit anymore. I would look at the mirror saying, "Mirror, mirror on the wall, I'm like my mother after all."

Stamped a woman by Art Impressions, cut it out, and colored with markers. N letter, hanger and swimsuit from QuicKutz. Put it all together. Stamped o, way in brown ink.
Friday, June 12, 2009

Forget Not


Made a 5 1/2 by 4 1/4 creme cardstock. Stamped Stampin'Up 'Toile Blossoms' set in two different sizes of flowers with light tan ink on the light tan cardstock. Colored in Copic markers in pastel on the flowers and the leaves. Printed the words in light tan color font on the creme cardstock with the Microsoft Word and cut it out. Round corner punch at the bottom left and right of the text card. Used a sponge and dipped in one color ink and lightly brushed on the side of the text card all around except the top. Then do the same thing in a different color ink and brushed it. Glued the text card on top of the front card. Applied some sparkle Sticklers in yellow on all the center of the flowers and let it dry. Applied it again.

Sunday, June 7, 2009

Hats Off!


Stampin'Up black cardstock and cut it half. Fold it. Put a Stampin'Up red cardstock inside the Cuttlebug Spots and Dots embossing folder and run through the cuttlebug machine. Then cut it into strip. Glue black with white dots ribbon on top of the red strip. Use adhesive on the back of the red strip and adhere to the left vertical of the black card. Graduate stamp kit in acrylic from Archiver's. Stamp the hat in black ink on the white cardstock and cut it out. Color red on the hat. Use black marker and make it a large vertical e on the cream cardstock. Write down "hats off!" at the bottom of an e. Put two self-adhesive 3D-dots to the back of the hat and adhere to the top of the e. Layer "hats off!" cream on red card and to cream and then glue to the black card front. Put two different sizes of self-adhesive shiny black dots and put on the left corner and bottom right corner. A small black dot on top of the hat. Congratulations to the Grads!!!!!

Saturday, June 6, 2009

Feeling Yucky?


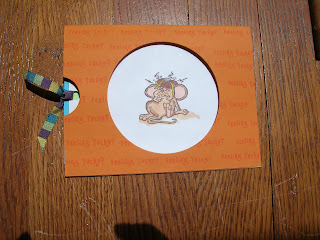
Form a 5 1/2 x 4 1/4 side-folded card from Stampin'Up Only Orange cardstock. Stamp "Feeling Yucky?" in Only Orange ink on top of the card. Die-cut a circle from center of the front card. Cut Gable Green cardstock to fit inside the card and stamp a "Wishing You a Full Recovery" in black ink through the center circle. Put the Gable Green inside the Cuttlebug embossing folder "Swiss Dot" and go thru the Cuttlebug machine. Put adhesive on the back of the Gable Green cardstock and adhere to the inside of the card. Put adhesive along top and bottom inside the card forming a pocket. Cut the Stampin'Up Tempting Turquoise cardstock to fit inside the pocket of the card. Cut the white cardstock to fit inside the Tempting Turquoise cardstock and glue it together. Stamp the "mouse" thru the center circle of the card. Color the mouse with markers. Punch the circle punch to punch a half-circle on left edge of pocket. Punch a hole through the left side of insert. Tie ribbon through the hole and trim ends. Place insert inside pocket.

Friday, June 5, 2009

Belated Birthday


I set up the Microsoft Word on landscape and typed the words on the left side. Printed it on the white cardstock. Then turn over the white cardstock and put in the printer. Typed the inside words at the half bottom of the cardstock and printed it. Used the cutting board and cut the landscape paper in equal half. Stamped the picture, color it and cut it out. Put 3D-dots on the back of the picture and put it on the card.